2024년 2월 27일에 작성되었고, 블로그를 이전하며 옮겨온 포스트입니다.
여기에서 원본을 확인할 수 있습니다.
Spring Boot에서 ChatGPT 활용하기 #1: API 연결 테스트에 이어 이 글에서는 Spring Boot에서 만든 API 호출을 통해 GPT의 응답 값을 가져오는 코드를 작성해 볼 것이다.
구조
gpt
ㄴ controller
	ㄴ GptController.java
ㄴ service
	ㄴ Impl
    	ㄴ GptServiceImpl.java
    GptService.java

application.properties
application.properties
https://platform.openai.com/api-keys 여기에서 발급받은 Secret Key는 저장소에 올라가거나 공유되면 안 되기 때문에, application.properties에 따로 명시해 주었다.
openai.api.key=발급받은_키Service
GptService의 코드는 다음과 같다.
ResponseEntity<?> getAssistantMsg(String userMsg) throws JsonProcessingException;GptServiceImpl의 코드는 다음과 같다.
@Service
public class GptServiceImpl implements GptService {
    @Value("${openai.api.key}")
    private String apiKey;

    public JsonNode callChatGpt(String userMsg) throws JsonProcessingException {
        final String url = "https://api.openai.com/v1/chat/completions";

        HttpHeaders headers = new HttpHeaders();
        headers.setAccept(Collections.singletonList(MediaType.APPLICATION_JSON));
        headers.setContentType(MediaType.APPLICATION_JSON);
        headers.setBearerAuth(apiKey);

        ObjectMapper objectMapper = new ObjectMapper();

        Map<String, Object> bodyMap = new HashMap<>();
        bodyMap.put("model", "gpt-4");

        List<Map<String, String>> messages = new ArrayList<>();
        Map<String, String> userMessage = new HashMap<>();
        userMessage.put("role", "user");
        userMessage.put("content", userMsg);
        messages.add(userMessage);

        Map<String, String> assistantMessage = new HashMap<>();
        assistantMessage.put("role", "system");
        assistantMessage.put("content", "너는 친절한 AI야");
        messages.add(assistantMessage);

        bodyMap.put("messages", messages);

        String body = objectMapper.writeValueAsString(bodyMap);

        HttpEntity<String> request = new HttpEntity<>(body, headers);

        RestTemplate restTemplate = new RestTemplate();
        ResponseEntity<String> response = restTemplate.exchange(url, HttpMethod.POST, request, String.class);

        return objectMapper.readTree(response.getBody());
    }

    @Override
    public ResponseEntity<?> getAssistantMsg(String userMsg) throws JsonProcessingException {
        JsonNode jsonNode = callChatGpt(userMsg);
        String content = jsonNode.path("choices").get(0).path("message").path("content").asText();

        return ResponseEntity.status(HttpStatus.OK).body(content);
    }
}
실제 API 호출하는 부분의 함수화를 통해 코드 분리를 진행시켰고, callChatGpt(String userMsg)에서 userMsg 부분에 사용자의 질문(요청) 사항을 입력할 수 있다.
그리고, getAssistantMsg 부분에는 callChatGpt()가 반환한 JsonNode 객체에서 ChatGPT의 응답 값만 Body 값으로 출력하게 해주었다.
Controller
GptController의 코드는 다음과 같다.
@RestController
@RequestMapping("/api/v1/gpt")
public class GptController {
    private final GptService gptService;

    @Autowired
    public GptController(GptService gptService) {
        this.gptService = gptService;
    }

    @PostMapping("/")
    public ResponseEntity<?> getAssistantMsg(@RequestParam String msg) throws JsonProcessingException {
        return gptService.getAssistantMsg(msg);
    }
}
GptController에 @Autowired 어노테이션을 통해 GptService 의존성 주입을 해주고, /api/v1/gpt 주소로 POST 요청과 함께 파라미터 값으로 msg를 전달해 주면, GptService의 getAssistanceMsg() 에 msg를 전달하고, 값을 반환받는다.
실행 결과
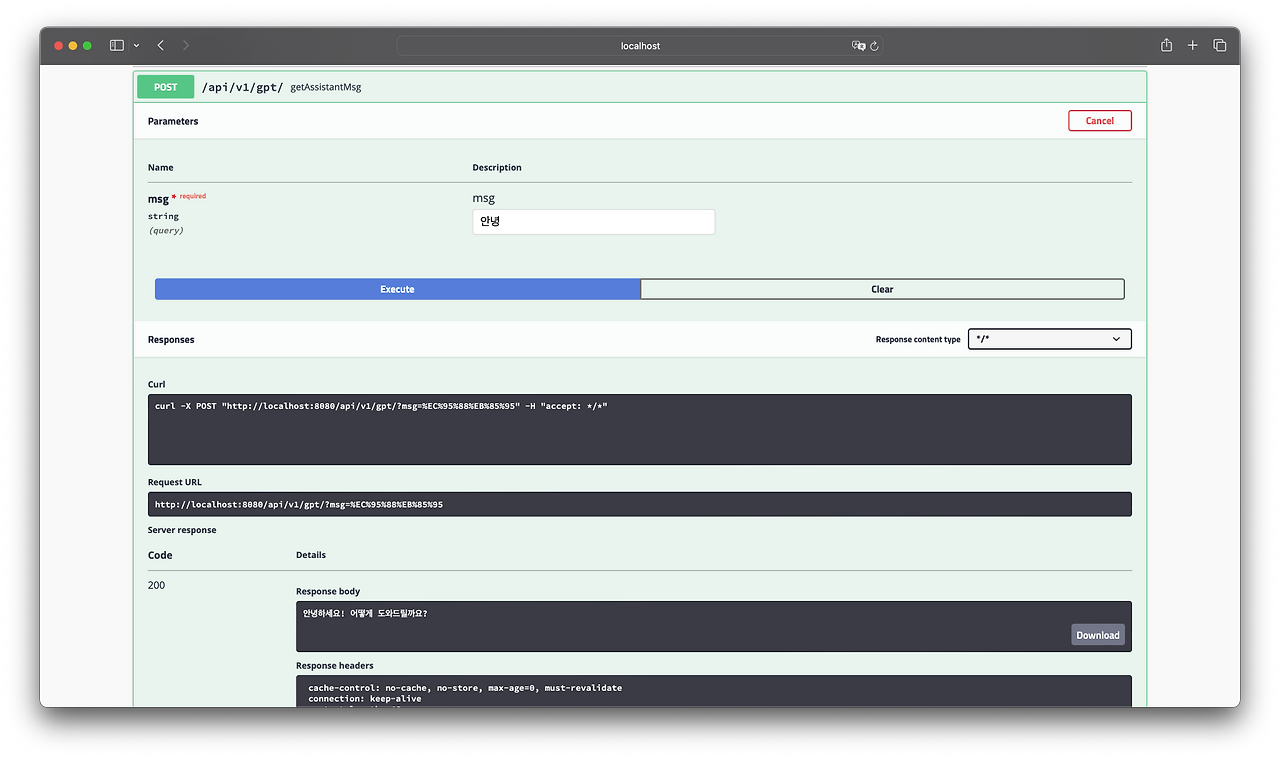
Swagger를 통한 API 실행 결과 안녕 이라고 요청을 보냈을 때 응답 반환 값에 안녕하세요! 어떻게 도와드릴까요? 라는 응답 결과가 돌아오는 것을 볼 수 있다.
마무리
이 글까지는 Spring Boot를 통한 OpenAI ChatGPT API를 호출하는 방법에 대해 정리해 보았다. 다음 글에서는 간단한 React 작업을 통한 대화를 주고 받는 프론트엔드 단 개발을 마지막으로 이 시리즈를 마치려고 한다.
'Backend > Java' 카테고리의 다른 글
| [오류 해결] SQL ERROR 1406: Data too long for column at row 1 (0) | 2026.08.22 |
|---|---|
| Spring, 테스트 코드는 왜 작성할까? (0) | 2026.08.22 |
| Spring Boot에서 ChatGPT 활용하기 #1: API 연결 테스트 (0) | 2026.08.22 |
| Spring Security: There is no PasswordEncoder mapped for the id "null" 오류 해결 (0) | 2026.08.22 |
| Cookie, Session, Token(JWT) 정리하기 (0) | 2026.08.22 |